How to Desing a Box for a Drawing
Using Adobe Illustrator and Adobe InDesign, here nosotros'll create a template for a simple rectangular box that's adaptable for cosmetics and other products. We'll besides look at how you lot can add pattern and type to your box quickly and easily.
This is a great all-round introduction to packaging pattern for beginners. A little fleck of knowledge most Illustrator and InDesign is useful, but not essential.
Looking for a quick-prepare solution to your packaging design needs? Yous tin detect a range of packaging templates and mock-ups on Envato Elements and GraphicRiver.
What You'll Demand
You'll demand access to both Adobe Illustrator, for creating the vector die line for your box, and Adobe InDesign, for putting together the artwork for your packaging.
To create the design pictured here, you'll also need to download the following images and fonts:
- Color splash patterns
- Avera Sans font - no longer available. Try this one instead.
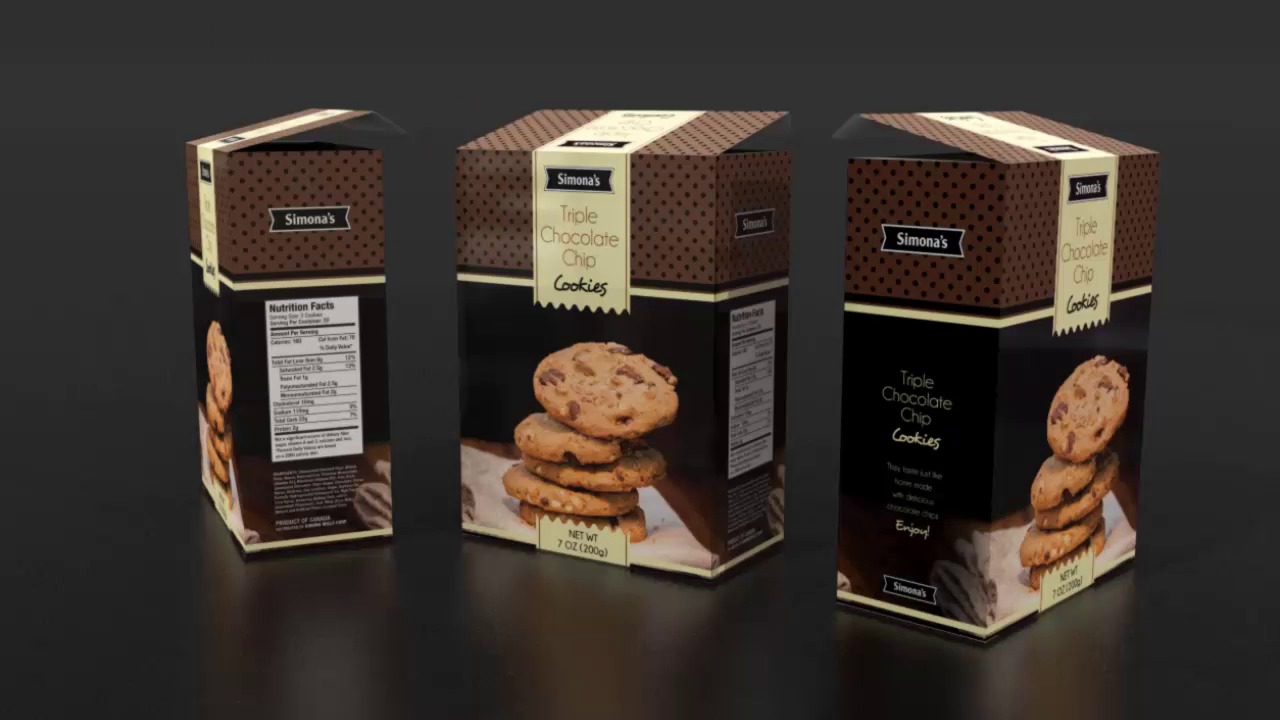
You can notice the box mock-upwards template for creating the image used to a higher place on Envato Elements.
1. How to Create a Box Template in Illustrator
Stride 1
You lot tin can choose to describe your ain box template from scratch using the drawing tools in Illustrator, just information technology volition save you lot a lot of time if you save the prototype below to your computer.
Open the paradigm in Illustrator and either use the Pen Tool (P) to trace the lines or use the Image Trace role (Window > Image Trace) to trace the paradigm, checking the Ignore White box to pick up only the black lines of the image.


Step 2
Go to File > Document Setup, and click on Edit Artboards.
Scale the artboard to a Width of 7 cm and a Height of 16 cm. These will be the dimensions of the face of your box. This is suited to a box for a 15 cm by 6 cm tube of hand cream or other cosmetics.
Select the vector outline of the template and scale it so that one rectangular face of the box fits on the artboard, as shown beneath.


If you lot desire to make your box bigger or smaller, you can arrange the dimensions of the artboard using the same proportions (i.e. a ratio of 7:16). Simply for at present, we'll work using this size of vii by 16 cm.
Footstep 3
When you accept the vector scaled to the right size, head up to Object > Artboards > Fit to Artwork Bounds.


With the artboard selected (File > Document Setup > Edit Artboards), brand a mental annotation of the new dimensions of the artboard, which should be approximately 290 mm by 343 mm.


And so select the vector template and Edit > Copy it. Yous tin now leave or minimize the Illustrator window.
2. How to Create a Dice Line in InDesign
Stride 1
Open InDesign and go to File > New > Document.
With the intent fix to Print, set up the Width to match the width of your Illustrator artboard (here, 290.36 mm), and Pinnacle to match likewise (hither, 343.ane mm).
The template is gear up up with a bleed surface area already, simply you tin likewise add more bleed if you similar, by adding a value under the Bleed section.
Click Create.


Step 2
Expand the Layers panel (Window > Layers) and double-click on Layer 1 to rename it Pattern .
Create four more new layers in this club: Folds and Bleed - Exercise Not Impress, DIE LINE - Practise NOT PRINT, Labels and, finally, Blazon .


Lock all the layers except Folds and Bleed , and click on this to activate it.


Step 3
Working on the Folds and Drain layer, Edit > Paste to driblet the template outline onto the page. Position it and then that it fits snugly on the page.


Step 4
On the vector, Right-Click > Ungroup.


Utilize the Option Tool (V, Escape) to select the solid line on the inside of the outline, holding Shift to pick up each section, equally shown below.


When you've selected the whole of this line, Right-Click > Group it.


Footstep five
In the Layers panel, click on the pointer to the left of the Folds and Bleed name to expand the layer. Identify the <group> you've just created.


Unlock the DIE LINE layer above it, and drag the <grouping> element upwards, dropping information technology into this layer.


Then lock the Folds and Drain layer, keeping the Die LINE layer unlocked and active.


Step 6
Expand the Swatches panel (Window > Color > Swatches) and choose New Color Swatch from the principal menu.


Name the swatch Die Line Spot Colour and set the Color Type to Spot. Increment the level of Magenta to 100% and click Add and Done.


Step 7
With the outline on the DIE LINE layer selected, switch the colour of this from [Black] to Dice Line Spot Color.


So, with the die line notwithstanding selected, head up to Window > Output > Attributes. Check the Overprint Make full box. Your die line is now properly ready upward for exporting—corking job!


On the Folds and Bleed layer, you should at present have only the fold marks and drain marks visible, which won't need to be printed*.


*Depending on the printer you use, they may want the fold marks to exist set up upwards in a spot color too, to allow them to be scored. To do this, repeat the same process to a higher place, using a different color (east.g. 100% Cyan) to mark the fold lines as different from the die line.
3. How to Add together Pattern and Type to Your Box
Footstep 1
Lock the DIE LINE layer and unlock the Pattern layer at the lesser.
Use the Rectangle Frame Tool (F) to create an image frame across the whole page, extending the edges upwards to the drain.
Go to File > Place, and choose a blueprint from the Colour splash patterns pack you lot downloaded earlier. Click Open up, and let the image to make full upward the whole frame.


Footstep 2
Use the Eyedropper Tool (I) to pick up the very pale pinkish color from the blueprint.


Double-click on the Fill Color box at the bottom of the Tools panel to open the Colour Picker window. Click Add together CMYK Swatch and so OK.


Repeat the process for the dark pinkish color in the background of the pattern, adding this to theSwatchespanel too. You at present have two complementary color swatches to use on the labels and type on your box.


Stride 3
If you have a busy pattern on your box, creating labels to sit behind text is an effective fashion of keeping text legible and articulate.
Utilize the Rectangle Tool (M) to create labels on the faces of the box, or for a more irregular look use the Pen Tool (P) every bit I've washed here. Prepare the Color Fill to the pale pink swatch.


Use the same tool to create a edge for the label, setting the Fill to [None] and Stroke Color to [Black].


Step 4
Re-create and Paste the label and edge, placing these on other sides of the box. Arrange the calibration on the primary face up of the box to create a more than foursquare label.


Step v
You can add a barcode to the bottom of your box by using the Rectangle Frame Tool (F) to create an image frame.


File > Place, choosing a barcode prototype, and Open up, centering it in the frame.


Step half-dozen
Lock the Blueprint layer and unlock the top layer, Type .


Use the Type Tool (T) to create a text frame over the top of the label on the second-from-right panel of the box. Type in a product title, and set the Font to Avera Sans Sketch and the color to your dark pink swatch.


Frame the heading with smaller text frames set in Avera Sans Castor and Bold, and in [Black].


Stride vii
Copy and Paste the prepare of text frames across onto the far-correct face up of the box, and so that the production proper noun can be viewed on two sides.


You can add together a list of ingredients or details nearly the visitor'southward website over the long label on the far-left panel.


four. How to Export Your Box for Printing
Stride 1
Make sure the layers y'all desire to accept printed and cutting/scored are visible. If yous don't want the fold lines to be visible (i.e. y'all haven't set them upwards in a spot color), and then make certain to switch off this layer. For sit-in purposes here, I've kept the Folds layer switched on.
Go to File > Export.Proper noun your file and choose Adobe PDF (Print) from the Format card. Click Save.
In the window that opens, cull PDF/X-1a:2001 from the Adobe PDF Preset menu at the height. This is the best version to cull for exporting die lines*.


*Some printers may asking you export any die lines or score lines equally a separate PDF file. To do this, consign each of these layers as separate PDF files. Then switch off the visibility of both layers in InDesign, and export the Pattern, Labels and Blazon layers only, in 1 PDF file.
Step ii
Click on Marks and Bleeds in the window'south left-paw carte du jour. Cheque both All Printer's Marks and Use Certificate Bleed Settings.


Then click Export to create your press-ready PDF file.
Conclusion: Your Finished Box
Once you've sent off your packaging artwork to the printers, it's time to sit down and look eagerly for your boxes to get delivered. In that location's nada more exciting than seeing your packaging artwork in 3D class—particularly when the boxes are on the store's shelf!


If you're eager to create more packaging designs, downloadable templates can be a quick and piece of cake solution if you're short on time. You tin observe a choice of packaging templates and mock-ups over on Envato Elements and GraphicRiver.
Looking for more packaging blueprint tips? These tutorials prove you more than ways yous tin create your ain boxes, packets, labels, and much more:
Yous may also be interested in our Product Packaging Design Course:
Source: https://design.tutsplus.com/tutorials/packaging-design-for-beginners-how-to-create-a-simple-box--cms-31606


Komentar
Posting Komentar